Hi everyone!
Todays topic is 3D photography. Many people are only discovering 3D photography but not many of us know exactly that 3D photography was actually first done in the mid-1800s. Many portraits of royals, important societies and buildings were shot using a 2 camera set-up and the prints were then viewed through special viewing binoculars which then gave the images their 3D effect. In hindsight it was quite ingenious actually but quite inevitable.
A simple (THE simplest way i've found) to create a 3D image (and i've only really done one so far..) is to take a photo of your subject through your left eye then move the camera to your right eye and take the same shot. Assuming you kept everything relatively level and your focus was on the subject at hand everything will fall into place nicely.
Processing
There are 3 methods of processing each with their own difficulty level. The easiest way is to put the two images side by side. Done. Now you have to try and see the 3D image by crossing your eyes - many people find this part the hardest but i've written a sure fire way you can learn to see 3D Cross View images:
1) pick out a point on the photos which stands out - an area of contrast perhaps or a particular person.
2) Look at the two side-by-side images but put your index finger 6 inches in front of your face in between the line of sight of your eyes and the photos.
3) Look at your fingertip.
4) move your finger forward and backward (while keeping your focus on your fingertip!) until the two photos overlap in the background. You should slowly see the area you picked out in point 1 overlap.
5) shift your gaze to the point you picked out in step 1.
6) allow your eyes to adjust to the image and move your finger out of the scene - if you are straining too much relax and try again. And remember to keep your head and eyes level otherwise it wont work.
Once you have mastered this technique you will find that the 3D Cross-View images are far superior to almost any other 3D method as it maintains the colour and lighting of the original images and gives a perceived resolution increase due to each eye having a separate image to look at.
The second method is to use photoshop or a similar peice of software to filter out the red channel on one image and overlap it with the other image. This gives the standard '3D' look of red + cyan. It isnt ideal because a lot of colour is lost, but the image is still in 3D. (I might go over that in a tutorial at a later date - its not that difficult really)
The third method is a GIF animation where each image is shown in a flickering manor. Your brain will process this as a 3D image (and its more on the lines of how 3DTV is processed) but this can only be viewed on a computer screen whereas the other two techniques can be printed.
A Few Examples
Here is an excellent Anaglyph (red/cyan glasses) 3D image: 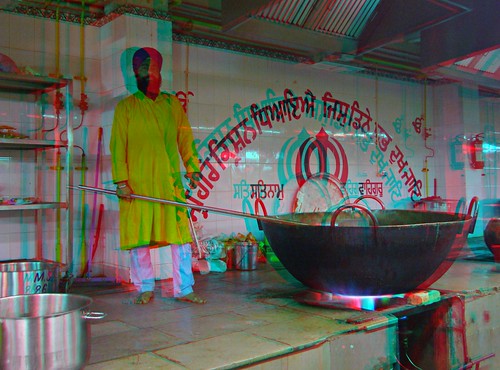
This is a 3D image from 1903 shot in India, Amritsar at the Golden Temple. 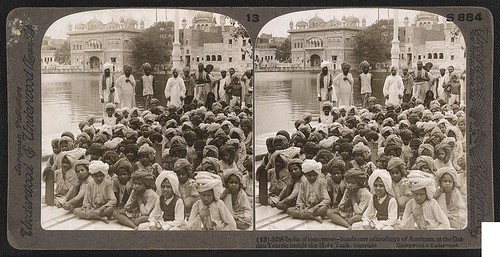
And this is my latest 3D photograph using the Cross-View technique
Have a go at making your own 3D photograph and send me a link!
If you found this interesting remember to subscribe or bookmark this page. Also, please join my Facebook group and follow me on Twitter :)
1 comment:
How about 3D photography on the new LG Optimus 3D? Launches 9.00am on Friday the 8th of July 2011
http://www.ur-mobile.com/mobiles/brands/lg.html?page=shop.product_details&flypage=youmania_flypage.tpl&product_id=44&category_id=6
Post a Comment